Tuesday, March 26, 2013

Egg Hunt!

Avery and her friends just had the best time at the Easter Egg hunt today!  Easiest rules ever:

1. Each mom brings 1 dozen filled eggs.
2. Moms hide eggs upstairs while kids destroy play in the basement.
3. Kids come upstairs and find eggs.
4. Kids stop after they have found 12 eggs
5. Eat all of the sugar Check out their loot! :)

It's so much fun for Avery to have so many friends her age - these kids may all end up on the same soccer teams, in the same classes, on the same school bus - so it's fun they already have become such good buddies!

The egg hunt was so much fun that we decided to make it an annual event (always hosting during spring break so the kiddos with teacher mommies can still make it!)


Monday, March 25, 2013

DIY: Egg Hunt Bags

I am SO excited about tomorrow.  Avery is finally old enough to hunt Easter eggs and so I'm hosting a little  Easter Egg hunt for her and friends! We've been practicing all weekend and she is really getting good at finding them!  You know I love a good party favor, but since taking home one dozen eggs filled with goodies probably is a good enough take home treat, I couldn't resist making personalized egg hunt bags for all of the kids.

After pondering whether to do a basket, a plastic tub or a bag, I stumbled across this cutie:


And ended up with this:

Here's what you need:
** 1 sheet of glitter card stock -of course you can use regular card stock, but isn't glitter better on anything?!- ($1.99 at Michaels)
** Cricut machine
** Kraft paper gift bags ($6.99 at Michaels for a 13 pack, $4.19 with a 40% off coupon!)
** Extra large white poms (.99 for a 3 pack at Michaels)
** Skinny ribbon (.50 at Michaels)
** Mini hole puncher
** Hot glue gun
Total Cost - about $10 for 8 bags or $1.25/bag - not bad!

Here's how to do it:
1. Use your Cricut & card stock to cut out letters.  I cut 1.25" letters and if you are cutting out some long names, I wouldn't go any bigger - I had one name almost not fit across the bag!
2. Punch a hole on either side of your bag at the top (some were closer together or farther apart depending on how long the name is.
3. String ribbon through the holes and tie in a double (or triple!) knot on the inside of the bag.
4.  Using your hot glue gun, glue letters to the ribbon & your bunny tail to the bag
The bags are lined up and ready to be used! Will post a recap after the big event tomorrow morning!


Friday, March 22, 2013

In Good Company...


I admit it ... I idolize female celebrities, probably more than I should at my age.  I can't help it - they are beautiful, strong, successful women with some of the most exciting careers I could imagine! Their beauty and lavish lifestyles easily make me envious of how amazing their lives appear to be and the thought of trading places with them for a day thrills me.  But the celebrities that we I worship are human too, and I'd like to say THANK YOU to many of them for coming out about their struggles with fertility.

Nick & I had a miscarriage last fall.  There - I said it, and maybe one day I'll even blog more about it. The miscarriage was by far the most devastating time in our lives.  Our hearts broke, we cried rivers and fell into temporary depression. At the time we wondered "Why us? Everyone else gets a happy, healthy pregnancy, but we don't."  But because of the similar stories shared by a couple of our near & dear friends (whose names will be kept private) and some of my favorite ladies in Hollywood, I slowly realized that miscarriage SUCKS, but is more common than you'd think - 1 in 5 pregnancies end in miscarriage.

So as my heart began to heal and my tears began to dry, I decided to take a different outlook on that horrible time - that I have now joined a group of elite women (famous and not famous) that wanted a baby so badly that they were willing to go to hell and back to get it. What we want in life does not always come easy and being a high powered, gorgeous, wealthy celebrity does not protect you from that heartbreak and trauma.   As silly as it may sound, these women have helped me not feel like a victim and that I'm alone in this - as I know now that I am in very good (and very fabulous!) company!

So to my real-life friends who have shared with me their tales of miscarriage (& who have went on to have healthy pregnancies by the way!) to my Hollywood-friends Courteney Cox, Celine Dion, Lisa Ling, Mariah Carey, Pink, Nicole Kidman, Beyonce, Bethenny Frankel, and one of my favorite women on this planet - Giuliana Rancic - THANK YOU for using the huge public platform you have been given to offer up your stories of miscarriage and heartache, but also of hope and positivity for the future.  Your stories, while heartbreaking, have been very therapeutic to me and millions of other women out there. 

To anyone reading who has suffered a miscarriage - I am SO sorry, it IS horrible, but it HAPPENS to the best of us - and life WILL GET BETTER, I promise!  And if you don't take my word for it, take Giuliana's. xoxo


Wednesday, March 20, 2013

DIY Shaker Eggs:

Our house is currently preparing for next week's big Easter egg hunt with Avery and her friends.  I can't wait to see the toddlers running around collecting their eggs, but there will also be a few babies here who are too little to join in the fun.  So what can you give an infant at an Easter egg hunt? .... An Easter Egg shaker!  

Supplies:  Plastic Easter eggs / Super Glue / 'Rattle' food of choice (I went with some Orzo that I had in the pantry, but you could also use rice, popcorn kernels, split peas, etc!)
Total Cost:  $0 - as you probably have it all on hand!

 Step One:  Fill shorter part of egg 1/2 full with your orzo/rice 
(test your shaker before you glue it to make sure there is enough 'juice' in there for you!

 
 Step Two:  Carefully apply super glue around the rim of your egg (easy to follow right in the groove).

 Step Three:  Close egg shut and let sit until dry.


Tuesday, March 19, 2013

Wedding Pictures

I wanted to share some of our wedding pictures with my Pinterest friends, 
so I have created a tab (look up) with some of our favorites.  And if I can ever find the CD 
with all of our pictures on it, I will be sure to add more detail shots!  LOVE wedding pictures!

Monday, March 18, 2013

St. Patrick's Day

Top o' the mornin'!  Hope everyone had a great St. Patrick's Day!  
We hung low yesterday, but it was a great day!

Of course, we ate plenty of St. Paddy's themed food..... 

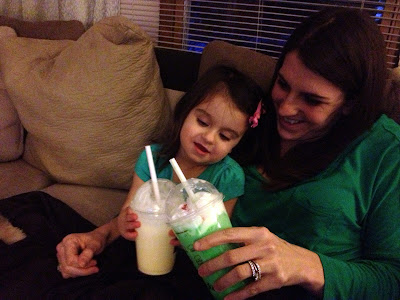
Lucky Charms & Green Milk - Since my daughter only drinks milk if it's chocolate, I thought I would give this a whirl.  Verdict: She took 1 sip of milk and ate only the marshmallows out of the cereal. :)

Green Eggs & Cheese - Make your normal batch of scrambled eggs (we use eggs, milk & cottage cheese) & add food coloring while it's cooking - I only used 1 drop to get my green color.  
Would have looked much prettier topped with mozzarella cheese! :)
 

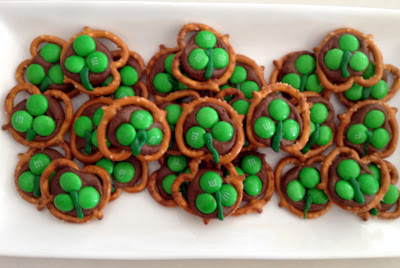
Shamrock Pretzels - top pretzels with Hershey kisses and bake at 200 degrees for 7 minutes. Right after you take them out, top with 3 green m&ms (I bought a big bag of m&ms and found enough green m&ms to make 30 pretzels). Make a stem with green icing (good thing I had a tube left from Christmas cookies!)

Lucky Charms Cupcakes - Make a Funfetti cupcake mix according to the box, pipe white frosting (I just used a store bought container - shhh!!) and top with Lucky Charms!  Note: do not top with Lucky Charms until right before you are wanting to eat them!  I did mine the day before and the cereal and marshmallows were soggy by the next day - still tasted good though!
 Shamrock Sandwich - We made grilled cheese & turkey sandwiches and just used a cookie 
cutter to make them shamrocks.  Serve with some green grapes and you have a cute St. Paddy's lunch.... without green food coloring!

I quickly realized that if I didn't come up with a themed activity, all we were going to do all day 
was wear green t-shirts and gain 10 pounds, so we decided to go on a GREEN HUNT!  
We grabbed a green bucket and headed to Avery's playroom where 
we would collect anything green we could find! 

Let's see what we found!

 We didn't do too bad!  It's a good activity for a 2-5 year old because it takes no set up time and it's free!  Avery is just starting to learn her colors (and really only calls out thinks that are pink!) so she needed a little help, but I will definitely do this again next year!


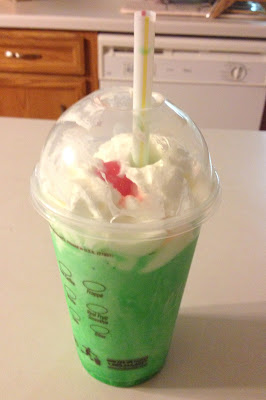
I decided weeks ago that I was going to try my first ever Shamrock Shake this St. Paddy's Day.  Everyone talks about them like they are crack and so I just had to have one.  We went to the drive through at McDonald's and instead of the typical "Welcome to McDonald's, would you like that super sized?" we heard "Sorry, we are OUT of Shamrock Shakes!" OUT?! It's St. Patrick's Day - Shamrock Shakes are probably the only reason anyone is coming to your disgusting restaurant! To say I was mad was an understatement!  Avery was in the back with a huge grin saying 'ice cream ice cream' so after a pout fest, we ended up with chocolate and vanilla shakes.  Pout fest continues.  My wonderful husband could sense my annoyance, so he decided not to give up - and with 3 already purchased shakes in hand, we headed right to another McDonald's and sure enough, they had a Shamrock Shake just for me! 

There she is in all of her glory!


Cheers to a perfect day!

Friday, March 15, 2013

TGIF!

What a busy week we've had!  Between the Bachelor finale, pizza with friends, craft time at Grandma's, a Pampered Chef party and a trek into the suburbs to visit friends, we are POOPED!  Was so excited to wake up today and just lay around and do nothing .... but we woke up to Avery throwing up in her crib instead! :(  So although I had to run a bath and do a load of pukey laundry, fortunately we are now cuddling on the couch in our jammies (and plan to do so the rest of the day!)

I'll be back on Monday to post our fun St. Patrick's Day details ... last year my Bupa (grandpa) passed away on St. Patrick's Day, so we plan to have a MUCH better day this year - and of course honoring his memory!

So until Monday, I'll leave you with another one of my favorites...


Thursday, March 14, 2013

Serenity Prayer

My favorite prayer at the moment....


Wednesday, March 13, 2013

Pinned This, Made That: Spring Grass Wreath

Yesterday Avery & I ventured over to my grandma's house for some craft time.  Bless her heart - her husband (my grandpa) passed away in November, so she spends her days alone in her 1 bedroom apartment in an independent living facility.  Since I credit my grandma for my inherited creativity gene, I decided our visit wouldn't be complete without a little craft.  Since it's almost Easter and almost (hopefully!) spring, I decided to recreate the ever-so-popular green grass spring wreath that's been popping up all over Pinterest - tutorial found HERE  

Here's a breakdown of our supplies (wreath form & ribbon not pictured)

* Wreath form - $6.99 at Michaels ($4.19 with 40% off coupon)
* Yarn Bee Haute Fur yarn in limelight (1 large Skein-76 yards) - $6.99 at Hobby Lobby ($4.19 with 40% off coupon)
* Simplicity 7/8" Lg Venice Daisy trim - $5.99 at Michaels ($3.59 with 40% off coupon)
* Long Pearlized Pins (1.58 in) - $4.99 at Michaels ($2.99 with 40% off coupon)
 * 1 yard of ribbon to hang (I used an adorable white/pink ombre ribbon from Michaels) - .40 on clearance!
* Scissors
TOTAL COST:  $15 - $26 depending on how many trips you want to make with Michaels to use your coupons! Ours clocked in at $20 :)

PHASE ONE:  Tie the yarn to the wreath form and start wrapping.  Keep wrapping and pushing the yarn tight together. What's nice is the form itself is green so if you have little tiny gaps, no one will ever be able to tell.  This step took us around an hour, but we were also gossiping/watching Snow White/entertaining Avery, so it probably won't take you as long!  This step is mindless & boring, so it'd be a perfect activity to do while watching Real Housewives or a 3 hour Bachelor finale! :) 

Here's Grandma hard at work....

And Avery hard at work supervising...

PHASE TWO: Once you are done wrapping, now it's time to pretty it up!  
The flower trim comes in one piece like ribbon, so cut each flower out individually, stick a pin
 through the middle & stab into your wreath however you would like!  Grandma's pretty particular, 
so I let her do this part all herself.  After all, it's her wreath she has to admire everyday! 


Now grab your ribbon (we found the most bare spot of the wreath to cover) 
and as Avery would say, TA-DA!  All done!

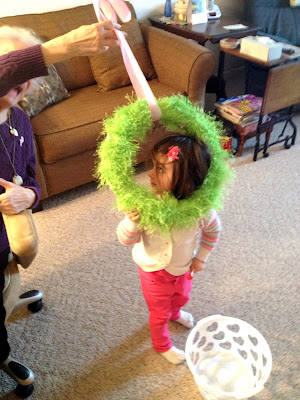
Grandma thought she was using the wreath as a lasso, but now I think it looks more like a noose! 
Good intentions... :)

Grandma was so proud of her wreath that she wanted to make all of her neighbors envious 
by hanging it outside her apartment.  So we wheeled on out to put it on display.

There she is in all of her glory!  Turned out pretty cute, didn't it?!  
I'm loving that white/pink ombre ribbon - I might have to go back and buy the rest of the spool!


Even though I can see snowflakes falling outside my window right now, 
Grandma's new wreath reminds me that spring is just around the corner ... I hope! :)