Here's a breakdown of our supplies (wreath form & ribbon not pictured)
* Wreath form - $6.99 at Michaels ($4.19 with 40% off coupon)
* Yarn Bee Haute Fur yarn in limelight (1 large Skein-76 yards) - $6.99 at Hobby Lobby ($4.19 with 40% off coupon)
* Simplicity 7/8" Lg Venice Daisy trim - $5.99 at Michaels ($3.59 with 40% off coupon)
* Long Pearlized Pins (1.58 in) - $4.99 at Michaels ($2.99 with 40% off coupon)
* 1 yard of ribbon to hang (I used an adorable white/pink ombre ribbon from Michaels) - .40 on clearance!
* Scissors
TOTAL COST: $15 - $26 depending on how many trips you want to make with Michaels to use your coupons! Ours clocked in at $20 :)
PHASE ONE: Tie the yarn to the wreath form and start wrapping. Keep wrapping and pushing the yarn tight together. What's nice is the form itself is green so if you have little tiny gaps, no one will ever be able to tell. This step took us around an hour, but we were also gossiping/watching Snow White/entertaining Avery, so it probably won't take you as long! This step is mindless & boring, so it'd be a perfect activity to do while watching Real Housewives or a 3 hour Bachelor finale! :)
Here's Grandma hard at work....
And Avery hard at work supervising...
PHASE TWO: Once you are done wrapping, now it's time to pretty it up!
The flower trim comes in one piece like ribbon, so cut each flower out individually, stick a pin
through the middle & stab into your wreath however you would like! Grandma's pretty particular,
so I let her do this part all herself. After all, it's her wreath she has to admire everyday!
Now grab your ribbon (we found the most bare spot of the wreath to cover)
and as Avery would say, TA-DA! All done!
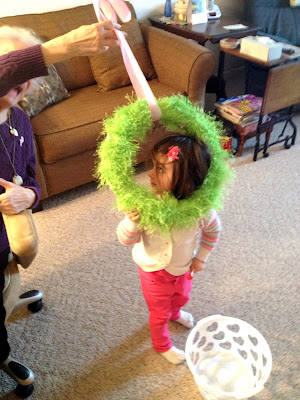
Grandma thought she was using the wreath as a lasso, but now I think it looks more like a noose!
Good intentions... :)
Good intentions... :)
Grandma was so proud of her wreath that she wanted to make all of her neighbors envious
by hanging it outside her apartment. So we wheeled on out to put it on display.
There she is in all of her glory! Turned out pretty cute, didn't it?!
I'm loving that white/pink ombre ribbon - I might have to go back and buy the rest of the spool!
Even though I can see snowflakes falling outside my window right now,
Grandma's new wreath reminds me that spring is just around the corner ... I hope! :)


No comments:
Post a Comment